Pages

Tuesday, April 2, 2013

April Newsletter Layouts

The newsletter will be going up shortly.  I still need practice at uploading the newsletter and things to the website.  My wonderful husband had been doing it but this is something I feel I need to know how to do.  So I will get there.  In the meantime I thought I would post some photos of some of the layout and projects that I did for this months newsletter.

I had a lot of fun this for this month's newsletter using the gorgeous papers we put in this months ScrapPack as well as playing with the Inkadinkado Stamping Gear by EK Success.  So lets take a look.

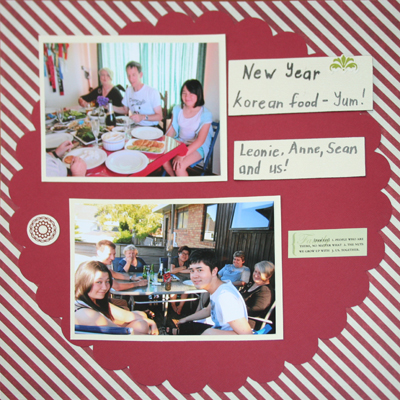
In this layout I have used the stamping gear to create a doily like image by using two stamps on the paddle.  I then teared the paper in the shape of the circle and inked the edge for this layout.
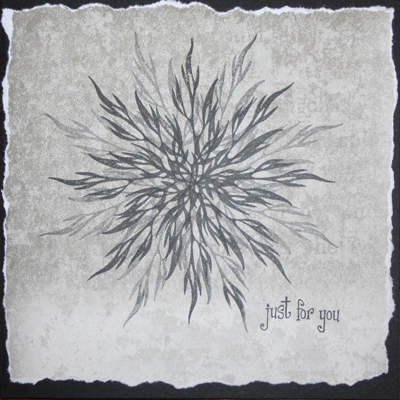
 For this card I had fun using the inside part of the circle wheel to create this fun almost fire looking card.  I also would ink up the stamp once but stamp twice to get the one image darker than the other.  I really like this effect.
But this layout has to be my favourite at the moment.  I used the Oval Wheel and the same stamp as the above card one but put it horizontally on the paddle to create this neat looking wreath.  I then added flowers.  I am looking forward to getting my hands on the flower petals stamps for the stamping gear so I can make my own flowers.
In the newsletter it also tells you how to use the Inkadinkado stamping gear.  I know you will have fun with this tool.  You can find all the tools and stamps on our online shop (click here)


April ScrapPack

Now lets take a look at the layouts that I made using the April ScrapPack.  All the instructions on how to make these layouts are in the newsletter.
 Remember This Day
Trail Riders 
 Four To Beam Up
 Snapshots and Memories
A Moment In Time
If you would like to order an April ScrapPack (as I do have a couple left) you can do so by emailing me at: megan@betterscrapbooking.co.nz

Happy Scrappin' everyone!

Wednesday, March 27, 2013

Inking Glazed Cardstock

Oh boy I have been having issues today with Facebook and being able to upload photos, so that has taken a lot of my time today, but I really wanted to post on my blog here with this fun technique that I was doing at my workshop the other night.  This is a really great way to add some colour that will also pop the design on your white glazed cardstocks from Bazzill Basics.  I love their glazed cardstocks.  Here is the layout I did at my workshop.

Ok so you can see the mat that I have put my photos on has some really cool cupcakes, well this was originally a white cardstock.  The glaze on these cardstock acts like a resist and so when you add ink it will not soak it in and so gives this bleach effect.

Here is what I did:
I put my white glazed cupcake cardstock on my inking mat and grabbed my Tattered Rose Distressed ink and ink applicator.
I dabbed my ink applicator to my Tattered Rose Distressed ink and then rubbing in a circular motion applied it to my cardstock.  I just love this look. 

Maybe this is something you can try with your glazed cardstock.

Tuesday, March 12, 2013

I made it!

Yes I made it, not only did a get around to actually making something with the Stamping Gear, but I made the card (she smiles)!


I am very pleased with the results.  Here I used a piece of 6"x 6" pattern paper, the fern like stamp from the Deluxe set on the paddle and the inside of the circle wheel.
I placed the circle wheel on the pattern paper and stamped around doing 12, 3, 6 and 9 o'clock.  The in between each of those I stamped about.  Lastly between all the stamps I had just done I did a faint stamp, so stamped on a piece of scratch paper then onto the pattern paper.  Very please with the results.


I added a stamped sentiment then attached my pattern paper to a folded cardstock black card.  It was so easy.  I wonder what else I can come up with.

The Stamping Gear products, tools and stamps are available from our online shop and in our workshop.
Click here for our online shop.

Have fun and bee creative!

Monday, March 4, 2013

Let's Try Something New

Today I have been given to opportunity to have a go using the new stamping product from Inkadinkado thanks to one of my wonderful suppliers.  I get to have a play with the Stamping Gear Deluxe set.  Oh my goodness it is so much fun.

I have watched a couple of you tube videos with people using the stamping gear and it looks so easy.  How often do you get something that is as easy to use as they show in the videos.  Well this Stamping Gear is truly as easy as it looks.  Check this one out below and see how easy this is to use.


I literally got the paddles, the circle wheel and two stamps out of the box and started stamping.  Ok I am just stamping of photocopier paper, but still it looks cool and I am having ideas on what you can create with it.  Here is what I had a wee play with.
I can't wait to keep you updated with I get up to this week with this fun and inspiring new tool

The Stamping Gear has already been uploaded to the online shop so jump on in and order yours.
The Deluxe Set us currently out of stock with my supplier but more are on their way for the end of the month, you can still order this and it will be shipped as soon as it arrives.
Click here to order yours!

Sunday, January 20, 2013

Fantastic Sizzling Summer Workshop

So we started Friday night and basically went through to Sunday afternoon.
What a fabulous chance to do loads of scrapbooking.  Here is everyone's scrapbooking spaces set up and waiting for them to come back the following day.
It was great to see everyone basically in the scrapbooking zone and enjoying a chance to really get into their hobby and create some amazing layouts and projects.  Here are just some of the things I managed to do over the weekend.

 Yes the Owl City concert layout and Smores layouts will be going side by side in my album.  I really enjoyed doing these layouts in particular, having them looks quite different and yet to look like the go together.
 I had this Kaisercraft kit sitting by my phone for well over a year and finally decided this weekend was a perfect opportunity to complete it.  I don't know what I am going to use it for at the moment so any suggestions are welcome!
Here is a layout that will be for the next ScrapPack kit but you can have a bit of a sneak preview.
Also through out the weekend one of my cats felt she had to join us.  To be sure she would stay off everyone's things, she had her very own pizza box.  She stayed on the pizza box pretty much the whole time.  So Kitty is now the ScrapCat!
Here are some of my favourite layouts from attendees from the weekend
by Glenna
by Glenna

By Moira

By Tracy

By Tracy

By Glenna

By Megan (myself that is LOL!)

By Moria
If you were unable to join us this time round I do hope you will be able to make it to our next long weekend scrap later in the year!

Wednesday, January 9, 2013

Summer Creativity and organisation

It has been an interesting Summer break, what with plenty of wet wild weather to start off with and now the heat is really kicking in.  It has been nice to spend time with family and friends and getting out an about, but, it is also nice to have time to create and organise.

I took the opportunity to attack the back room of my working office over the summer break.  I wanted to turn the back room into a nice Craft room for myself and my girls.  We seem to be a very creative family but now have a space where we could creative comfortably.  So out came the rubbish bags and the organising systems and here is what I have so far.
My crafting space
As you come through the door of the craft room, my table is right opposite.  It was under the windows, good light but too much sun, so I turned it and put a book shelf under the window instead.
Grace's table
My eldest daughter has her table next to mine.  Her table has been here awhile but had junk and stuff in front of it so she was unable to actually get to it for quite some time to do anything.  She is enjoying having a space  where she can 'work'.
Melissa and her fashion corner
Almost opposite Grace's table is a new addition, Melissa's table.  I took a table from my working workshop and let Melissa have it as her space.  We can if necessary move it into the workshop if we are going to have a lot of people for an event but in the mean time Melissa can use it for her crafting and sewing.  As you can see she is busy at work sewing a nice summer top.
I have added a nice big cubby shelving unit for all my scrapbooking, card making and paper crafting storage.  It has been good to reorganise all my supplies so I can find things easily and each thing has its' own home.  I am not quite finished but at least I have a good start and something to work with.

My Craft room is in a good enough state that I allowed myself to do some creating, so here is what I have done this week.
I created this beautiful card using an image I coloured using my Spectrum Noir pens.  I have come to really love colouring with these pens.  I will be having more classes this year with fun techniques you can use with these pens, so keep an eye out for those.
Mall Shoot Layout
During the tidy up, Grace found these little photos of her when she was about 2 1/2-3 1/2 years old.  I just had to create a layout.  I remember how much she loved riding those mini ride things at the malls.  We didn't even have to pay to make them go for her to enjoy them.  On this particular day I had some spare coins and let her have a proper go and it did the photos as well  - bonus.  It has only take me about 16 years to scrapbook them though LOL!  I love the colours in this layout.  I love the photos as well so candid.

So that is what I have been up to this Summer break, what have you been doing with your crafts?

Thursday, December 27, 2012

What a big surprise

I am learning that the wool can be pulled over my eyes way to easily.  I have just had the second biggest surprise happen to me.  The first was years ago when my husband and pen-pal surprised me with the visit of my pen-pal and his wife.  Brad had kept this quiet for months and I had NO idea.  I knew then that Brad could be really sneaky.

Well I have just had the second biggest surprise.  As many of you know I have got into running and Zumba.  What you might not be aware of is I have also discovered I enjoy cycling as well.  But I have been having to use my youngest daughter's bike.  All my family have a bike but me as I did not think it was something I would enjoy.  They would all go mountain biking and I would have no problem staying home and crafting.  But recently I thought biking around the neighbourhood would be fun so started off going with Grace.  So Grace would go on her bike and I would ride Melissa's.  I would also use Melissa's helmet and Grace's gloves (Grace would then use Brad's gloves).  Then Melissa started school holidays and I thought it would be fun for the three of us to go for a ride, but there inlay a problem, they had a bike but I didn't (I could not fit Brad's bike but also he has special pedals).

For Christmas my wonderful family was able to get me a lovely red helmet and some lovely green gloves so at least I would not have to keep borrowing theirs.  Then this afternoon as I was cleaning the craft room my Mum popped by.  I still did not suspect anything.  I should mention she also rang yesterday to talk to Brad but I did not pick that anything was 'up'.  When Mum and come round this afternoon, Brad had 'popped' out, still I had no idea.  I invited Mum in and offered a drink.  So we started chatting and I showed her my new helmet and told her that I planned to go for a ride to try out my helmet using Melissa's bike tomorrow morning.  She asked about us all going for a ride in the morning and I said how that would not work.  But she kept saying, "but what if you could"  Finally I twigged something was up as Brad had come home by now.

Sure enough I popped outside and there was my new bike.  Similar to Melissa's but red like my helmet - AWESOME!  I was and still am soooo excited (Can you tell by the look on my face in the photo below - such an awful photo but it does show the excitement LOL!)  So hopefully it will stop raining soon so I can take it for a test ride.
Do I have the most awesome Mum of what!
My new red  Black Thunder bike
So to my wonderful Mum and sneaky assistant Brad, thank you, thank you , thank you, I really love it.  I have not had my own bike since my blue 10 speed back in high school.  My new bike is way better.

Hmmm now I might just have to really think about doing a duathlon in 2013.  Whoop whoop I am going to be really fit in 2013 that is for sure.

Ok gotta go try out my new bike :)

Sunday, December 16, 2012

Treat Tree

I was catching up with one of my scrapbooking student's Mum the other day at my youngest daughters end of year prize giving at school.  She was telling me about what she was doing last week for some children in her neighbourhood.

Mrs G has a lovely tree that is planted outside her house near the street.  she decided she wanted to do something special for the children that go to the school that is pretty much right outside her gate.  Each day she would go out to her tree and hang little treats for the children.  Each day she tried to make it a bit different.  What a lovely idea this is.  She hung lollipops, and candy canes.  It did not take long for the children to realise these were left for them.

What was also really special was that one of the children left a lovely card for Mrs G as a thank you for all the treats of last week.  Personally I think it is really cool and a great way to share the Christmas spirit at this time of year.


Sunday, December 2, 2012

Reindeer Noses How To ...


I have been requested to share how I put together my reindeer noses topper so here you go.  The plastic bags are some I had lying around but they measured 5" across the top edge.
You will need a square piece of cardstock mine was a 5" square, you will want to measure your plastic bag across the opening and use that measurement to make your square.

A piece of 1 7/8 strip of coloured cardstock - green
1 2" circle - a different shade of green
1 reindeer punch - brown

Score and fold your square cardstock in half, this is the base you will be building for your reindeer nose topper.

Take your green 17/8" strip of green cardstock and slot it through the back of a flourish note punch (or use a fancy template to create your fancy edge) and punch.
Ink your green strip and your folded topper, I used pinecone brown.  Adhere your green strip so your fancy edge is down the left-hand side.  Don't worry if it does not go all the way across the topper it is going to be covered by the circle shortly.
Adhere your reindeer punch shape to the front of your 2" circle using foam tape for some dimension.
Adhere your 2" circle to the right hand edge of your topper.  You may like to add a red bling to your reindeer's nose.
Add your title and or sentiment to your topper.  To attach to your bag of chocolate just use your stapler.

Enjoy and I hope you have as much fun making yours as I did with mine.

The chocolates that I used were Maltesers and Jaffas - YUM!
Remember you can have a treat whilst making these ... though just one or two (handfuls LOL!