Pages

Showing posts with label Scrapbooking. Show all posts

Wednesday, June 27, 2018

Whales and Ducks

I have been so busy this past week with Group Fitness things and many other things that I just needed time to scrapbook.  So the other afternoon I went into my craft room and put together a layout.  It was great because it was one of those pages that almost put itself together.  I knew almost exactly what I wanted it to be like.  I wanted a white layout (very strange for me, I like lots of colour) with some white on white elements.  The reason I wanted white was because the whales in my photos were white and I wanted the layout to depict more about the whales.  I had never seen Beluga Whales before.  Grace had mentioned seeing them on her last visit to San Diego.  So it was very special for me to see these normally shy creatures.

I cropped two of my photos to be 4"x 4" and placed my photos as you see.  I wanted them on white so I cut a piece of cardstock to measure 10"x 11".  I then wanted to use one of my border punches (which I had recently been reunited with after them being in storage for nearly 6 months) I also wanted another border punched out and layered above the first large border.

I adhered my photos in place then added the second small border which I punched from a scrap piece of cardstock leftover from trimming down the white cardstock.

I put this white base on some light blue cardstock.  I punched 5 circles measuring 3/4" each and adhered them in the bottom right corner being sure to have the first one hanging off the page for some interest.  Once I liked there placement I cut the excess off the circle hanging over the edge and added it to the top left corner.  I didn't want to throw away that little piece, silly, but I like the result.

I found some little light blue bling and added them to the circles.  I was going to put them in the center so that they would all look the same, but then changed my mind.  I like how they look all different and so added a couple (3) extra round the circles.

Lastly I added my title which I cut from using my Silhouette Cameo.

Well, that is my tale about my 'whale' layout.  Now to fill you in on my 'duck', or in this case duckling.

I currently have a wee little duckling living in my bath tub.  Oh, it is so cute.  It has been nicknamed "Peepers".  We have some very early duck and duckling families in my backyard.  One is a mother of 4 (now 3 but at the time of this incident she had 4).  She has been round the house for a few days with her babies so I have been feeding them some rolled oats.  Anyway, the other afternoon I could hear some distressing peeping.  I went out my front door and there was mother of 4 attacking this stray little duckling.  She was really pecking at this wee thing.  I could not stand by and see this so I intervened.  Then, mother of 4 was thinking I was going to go after her four babies so she was getting ready to attack me.  Stray duckling joined her 4 so I thought OK she is defending it, it should be OK
now.  I walked away but saw she started to attack it again.  This time I caught the little duckling, but mamma was not going to let me pass.  It didn't help that duckling was peeping so mamma defended and flew at me.  I told mamma to be nice to it and let it go, just for her to start attacking again.  This time I rescued the duckling and made it into the house.

I have a cat box set up in my bathtub with a warm heat pack for it (I warm it regularly).  There is also an ice-cream container of water for drinking and swimming.  I also have food all over the floor of the bath tub.  It seems happy enough.  I take it out of the tub now and then to let it run around (when I can make an area secure).

I am not sure how my cats are going to take to this little one.  So will need to be careful for a little while.  The cats don't care about ducklings in our backyard, but could be different with one in the house.

Tuesday, June 5, 2018

Walrus Kisses

I have never seen a Walrus up close and personal before.  This was amazing.  This guy was determined to either clean the glass of his enclosure or to be giving everyone kisses.  I can't get over what an amazing place Sea World is, there just seem to be so much to look at everywhere.  The animals we fabulous.  I guess since we don't have anything as big as this here in NZ that it just blew me away.

It is very rare for me to do a layout on white cardstock.  I guess since that was where I started until I was introduced to pull sized pattern papers that was what I was force to use.  So it was quite refreshing to just grab a plain piece of white cardstock and see where it took me.

I grabbed a piece of pattern paper which had a shimmer like the water that had green circles and cut it into a large circle.  I cropped my photos down so they could fit across the page.  I cut a piece of light green/blue cardstock to sit under the photos so there were anchored in place.  I added some little green fish (in case my walrus got hungry).  I tore a small piece of cream cardstock to go under my other cardstock border that is anchoring the photos.  The tore edge gives some texture to the layout.  lastly I cut out a title from grey cardstock and adhered it above my landscape photo to balance out the photos.

I am very happy with how the layout came together.  I think I should try more white layouts in future.  It makes a nice change.

Monday, June 4, 2018

Mesmerized

As you can tell we really enjoyed our time at Sea World, San Diego.

Here is a layout I created showing how mesmerized my daughter was with the Orcas.  They were such incredible creatures..  The female in this tank was quite old and un-interested in things until this young male Orca came to the park.  She came alive and wanted to play. they are like soulmate as one of the Sea World volunteers was telling me.  They stick together whenever they can.  My daughter just stood so close to the viewing glass she was almost part of the glass.  She could have stood there for hours just watching these two swim, and play.  They had a toy in the water that they took turns playing with.  It seems the 'string' part of the toy was made from old fire hoses (to be strong enough to last with Orcas playing with it).


With this layout I used a Hero Arts stencil and some Lawn Fawn coloured inks (a blue and a grey) and added this mesmerizing pattern over half of my background card stock.

I added my photos, a title (cut using my Silhouette Cameo), some twine and some journaling on a piece of vellum.

The results with this finished layout share the feeling my daughter had with the whales.

Tuesday, May 1, 2018

Workshop Layouts

I have two layouts to share with you.  Both I started at my last workshop.  The first I want to share with you is the last layout I did at my workshop.  To be honest all I did with this one at my workshop was to adhere a 5"x 7" photo to a scene pattern paper (I covered the yellow submarine with the photos LOL).
Yesterday using my Silhouette Cameo I cut out the title and the Orca.  I started with just 'Amazing' but then added the 'Creatures'.  Then using a date stamp I added the date we went to Sea World.

The second layout was my first layout I did at my workshop.  I wanted a red gingham paper for my background as we had gone to a traditional Italian pizza place for lunch that day.  But it needed breaking. I cut a narrow frame from black cardstock and a narrow circle frame from kraft cardstock, I adhered these to my layout then added my photos.
Today I cut out the title and stamped two tickets stamps for a bit of fun.  Lastly I added a journaling block (which now has journaling in it)

Can you believe, at this pizza place I had a huge tasty ... salad.  The food and company was amazing.  We had some good laughs.  It was great to stop briefly after shopping in Coronado - a beautiful sea side town with amazing houses (one of my next layouts)

It is so much fun to work on my holiday album.  I love remembering all the fun we had as I look at the photos before and after I scrapbook them.

Wednesday, October 4, 2017

Journaling Strips

I had such a great week.  Two days this week I have been able to sit in my craft-room and scrapbook.  I am not saying this to brag (OK maybe a little).  On Monday, seeing as it is school holidays, my daughter was able to arrange with her friends for them to come round. This meant, I was banished from the house (honestly, it was what I wanted, six 18 yrs olds was just a little bit much for me)  So I was able to enjoy my craft room and finish of a few layouts that I did at the workshop last weekend.  Don't you love that feeling when a layout is complete - title, journaling, the lot.  Very satisfying.

Well, yesterday I was able to have another day of scrapbooking. It was amazing, I managed to complete three layouts.  I am trying as I go to be sure each layout is complete including journaling as these are layouts from my trip to the US and I don't want to forget anything.

One of the layouts I decided to try something new for me.  To add journaling in strips.  I have seen layouts with this over this years and thought they looked good, but was never confident enough to give it a go.  Or they were done using computer journaling and I wanted hand written journaling.  So this is what I did.

I cut a piece of cardstock about the width of the space I had available on my layout.
Then I cut it a bit shorter than I wanted it to be when finished - knowing that when I cut the cardstock into strips I would want to spread them out a bit down the space.

I wrote my journaling in pencil first to be sure to get the spacing right.  I was strange to write with huge gaps between each line.  But this was so I could cut each line apart easily when the time came.

I wrote over my journaling in brown pen to match the feel of my layout (sometime black is too harsh)
Once the ink was dry I erased the penciled journaling.

Then it was time to bite the bullet and cut them apart. I used my trimmer and carefully cut them apart.
I would cut one strip at a time then place that strip on my layout so I would not mess up the order.

Once my journaling was cut apart and laid out I lined up my layout on the grid of my cutting mat, then lined up my long ruler down the edge where I wanted my journaling to go and adhered each strip in place.  Having the ruler as a guide so all the strips lined up down the left hand edge was a great help.

I was really pleased with the end result.

Monday, August 29, 2016

Latest Layouts

I had my monthly workshop over the weekend and managed to mostly finish 3 layouts.  I got them to the point at the workshop where all I needed to finish them was my titles - these I do at home where I can use my Silhouette Cameo.
Well today, I took the time to design, cut and add my titles to my layouts.  I also worked on another cardstock house ready for my Christmas Village at the end of the year.  A couple of weeks ago I made my first building for the village which was the school.  Today was a house.  I might do the church next.


Anyway, here are my three layouts.  Firstly I put together this layout of my daughter taking part in a busking competition at the beginning of the year.  I wanted to do something a bit different with my layout so went for a colour blocking style of layout.  So pretty much the whole layout is covered with different sizes of cardstock and pattern paper cut into rectangles.  The plain Bazzill Calypso cardstock I embosses using a music embossing folder.  I am really pleased with how this page came together.  Sometime working with a landscape photo and a portrait photo can be difficult to find a way to display them creatively on a layout.  I like how these compliment each other without having to be beside each other.

My next layout was when my eldest daughter visited my pen-pal and his wife last year and they visited the Cheesecake Factory.  As big fans of the TV program 'The Big Bang Theory' this was a fun visit.  Apparently their slices were huge and my daughter shared her piece with her best friend that also traveled with her last year.  I am looking forward to maybe making a visit for myself next year - we will see.  For the four small photos in the middle I just cropped two photos and mixed them up together.  I like the use of the two pattern paper circles.  I am also trying to experiment and play a little more with my titles and using more than just one font to give a fun looking title.
My last layout I really stepped out of my comfort zone and created a sun-rays with pattern paper.  This was fun as I just cut some pattern paper and just trimmed  blue each strip then placed those on my cardstock, then measured the gaps between each piece and cut strips accordingly.  I am very pleased with the out come.  I adhered all the strips in place so they hung off the edge of the layout and once happy with there placement I trimmed off the excess.  My daughter really loved this wee little dog.  He was a bundle of energy and morning kisses - what a great way to wake up in the morning LOL!

Well during the rest of this week I am hoping to get some more colouring of stamps done so will do a post on my next colouring project.  Until then ...

Let's get creative!

Monday, August 15, 2016

Title Spacing Trick

I love cutting out my titles using my Silhouette Cameo, but have often found once cut out I can't get the title to look good on my layouts as my letter and word spacing goes out the window.
Just last week, I cut out a title and took it will me to finish the layout at a craft group.  While at the craft group I started using the negative space of my leftover title as a guide as to where to put my letters on my layout.  Wow, it worked and was so easy.  Let me show you how I did.


First take you layout and place the negative space of your title onto your layout and decide where you want your title to be.


Once you are happy with the placement of your title start adding adhesive to the back of your letters and adhere them back into the space where they were cut from.


Carefully remove the negative space cardstock from your layout


Check out your perfect looking title. Here is the finished two page layout.
This has become a favourite way to get my titles looking the way I want them.  It helps to design and cut out your title using your Silhouette, Scan'n'Cut or Cricut so that it cuts the way you want it to look on your finished layout.


Wednesday, February 3, 2016

Changes to Better Scrapbooking Ltd

This is my first post for 2016 so Happy New Year everyone.  Some of you may think I fell from the planet, no I am still here.  There have been lots of changes here and now is the time to reveal my plan for 2016.

As many of you are aware from some of my Facebook posts I have moved my workshop from our home garage to the lovely little room behind the garage.  This was a much bigger task than I thought at the start.  But finally I am at a place where I have a nice place to create and craft.  The only down side is it is to small to display shop stuff or have classes and workshops.
The cluttered workshop stage - eek, I was trapped

Looking from the door of the craft studio

Showing my scrapbooking table
This meant some changes to the way I run Better Scrapbooking Ltd.  Please don't get me wrong, I love scrapbooking and card making.  I love being able to help you with ideas and new products so that won't change.  The online shop and my online presence will continue and aim even higher with more videos and ideas for everyone.  I love workshops so these will continue, just at a local hall (the Oratia Settler's Hall) just round the corner from me.

The ScrapPack Club closed as of the end of last year and the Spectrum Noir Monthly kit will finish when those that are receiving it at the moment finish getting all their Spectrum Noir colour pen sets.  I will continue to bring you new products and ideas which will be available from our online shop.

I am looking forward to having more time to create with new products and to share fun tips, techniques and ideas with you all.  I was lucky enough over the summer break to up-grade my camera which now enables me to create videos.  I am aiming to create my first video shortly (probably once school starts back and a new routine is in place)

I have also started a new little part-time job as a personal carer assistant and have really been enjoying that lately.  I have been amazed that even with my little job I still have time to create and craft, maybe even more time as I reschedule things.  I have been continuing to work on my daughter's school ball album from last year and have almost finished it.

So as you can see there have been some changes but we will be continuing and we plan to bring you some amazing projects and ideas throughout the year.  So please continue to support me, I thank you for all that you have supported me with so far.

Tuesday, June 2, 2015

Creativity on the Run - or in my case during the Wait!

Sometimes in the middle of a crazy busy week it is nice to take an hour to do something fun and something just for you.

I did that last week and again this week.  I was frantically getting my newsletter and ScrapPacks done.  It was the last minute crazies.  But as soon as all the ScrapPacks were packed and shipped I took some time to try out a couple of dies.

The first one I tries was the new Teresa Collins words die.  Oh wow, these cut so nicely and look stunning.  I just had to use them on a couple of cards that I made.


The next die I used was the Elizabeth Craft Designs Adirondack Chair Pop It up Die.  Oh I am so happy with how this came together.  They do recommend you cut the top pattern paper at the same time as the cardstock so you know everything will fit together when it comes to assembling the card.

I was impressed that these dies cut and emboss at the same time, very cool!


My daughter things I am really funny!  On a Wednesday night she and I drive out to Onehunga (half and hours drive from home) as she teaches a Zumba class there.  She doesn't quite have her restricted license yet so I need to go with her.  this use to be my time to write my G&T emails.  But now, my daughter is impressed as to how as soon as we pull into the Onehunga YMCA car-park I can turn the car into a mini craft room.  I now bring my Spectrum Noir pens, cut-cut cards, adhesive, pencil case and other bits, and I will set and craft until it gets to dark (being winter it gets dark early now).  Then I read or write blog entries, or newsletter articles.  Hey! I might as well make the most of my time - right!

Where are some of the strange places you craft or create?

Sunday, May 17, 2015

Creative Weekend

I just love having workshops and being able to join in and do some of my own scrapbooking.
We had a great night on Saturday night with some scrapbooking friends and here are some layout that I created.

I started off with doing a really simply layout.  Today I finished it by adding the title.
I have been trying to do a layout with some photos for the past few weeks and just got kind of stuck.  On Saturday night, finally, I was able to put together a double page layout.  I am really happy with the way it turned out.

Then on Sunday my sixteen year old daughter wanted to get creative with crayons.  She had seen some really fun projects you can do with crayons on Pinterest (where we all find amazing projects).  We had picked up five boxes of 24 crayons on Friday night, so why not!
I helped her set up but left her to be creative and here is one of the projects.  It is not quite finished yet, she needs to add a girl holding an umbrella silhouette.  But I just had to share how well this turned out.  I love the melted effect.

I hope you have time during the coming week to try something new and be creative!

Monday, April 6, 2015

Duck Layout

At the beginning of this year we had a Mother duck of over 20 ducklings staying on our property.  We suspect she had more than one lot of ducklings as they were two different colours.  As you kind of expect with ducks the numbers started to dwindle and one day she was down to only 8 ducklings.  The next day we noticed she had what looked like a broken jaw, but we could not catch her.  She disappeared for a couple of days and then she was down to three babies and again we decided to try and catch her to take her to the local Bird Rescue, but again no luck.  It took us a total of three days, a borrowed cat carrier and two chicken nets.  Sadly but the time we did catch her she was down to just two ducklings.

Taking her and her two ducklings to the Bird Rescue was not to bad.  But once there she got out twice and made a run/fly for it.  I have no idea what happened with her care but I do hope she made it and the two ducklings made it to.

I did manage to get a couple of photos of Mother Duck and ducklings are they were caught and on the weekend created this layout.  I do like it when we have ducks and their ducklings, they are so much fun to watch and feed out the dining room window.

Wednesday, February 11, 2015

Valentine's Day is just round the corner

There is only a couple of days left before Valentine's Day.  If you have not created anything for your loved one, well now is a great time to create this fun little Valentine's Pouch.  It is simple and only requires a 6"x 6" piece of double sided pattern paper and some simple embellishments (I used a couple of flowers and a brad)

The paper I have used is the Authentique Crush range, Spark pattern paper.  With this I was able to make four pouches.
To start with fold your pattern paper in half diagonally with the pattern you want on the outside of your pouch on the outside like this. Be sure the fold is along the bottom.

Take one of the lower corners of your triangle and fold it over to the middle of the other triangle side.

Take the other lower corner of the triangle and fold it over to the middle of the opposite side.
Take the first top point and fold it down to create your pouch. This will also show the inside pattern of you paper.  Very stylish.
Now you can decorate and fill you pouch.  Here I have added a couple of flowers with a brad.  I also added a little bit of adhesive tape under the flap where I attached the flower to hold in down against the front of the pouch.
I filled my pouch with some Hershey's Kisses wrapped in a piece of clear cellophane and tied using some pink bakers twine.

I am sure this will be enjoyed by your loved one - or maybe even treat yourself.

You can also use this with other papers and embellishments to give for any occasion.

Wednesday, October 1, 2014

Happy Girls

I am probably the happiest when I get to create and when I get to work in my garden.  Though creating is the best.

This week I thought it would be fun to give one of the Echo Park Mini Theme packs some of my attention.  I popped down to the shops and picked up a cheap embroidery frame and using the Echo Park Mini Theme Princess kit I created this fun wee project.

I had so much fun with this that I will be doing this as a kids class in Term 4.  I created the flower on this project using my Silhouette Cameo and one of the flower files from Silhouettes online shop.
I used a piece of ribbon so that I could hang this lovely frame.  At the moment it is hanging in my workshop as I decided where it will permanently live.

This is the kit that I used and it is available from our online shop
Echo Park Mini Theme - Princess
$13.50
Click here to order yours!

Tuesday, September 9, 2014

Stenciling with Stencils

Ok for one of the challenges this month, it asks for you to use a stenciling technique on your layout.  I have had a couple of people asking what stenciling in scrapbooking is, so I thought I would do a quick blog post of some stenciling ideas.

To start off with there are many stencils available out there from the alpha stencils we used as kids to the fancy alpha and shape stencils available in scrapbooking and card making today.

With stencils you could use them to trace the image with your pens - this you might like to do for a title.  But more fun techniques are using things like ink, spray ink, acrylic paint, modeling paste and chalks.

Here are a couple of layouts that I have used stencils on.

This layout used the cutout from inside the stencil to
create a make and inked over using an ink pad

This layouts title was traced from a stencil

This layout used a stencil and modeling paste over
the whole background of the layout

On this layout I used the modeling paste and a stencil for the
border and then sprinkled glitter over the top

On the layout I used the stencil and spray ink to create
 the look of the chicken wire background.
So I wonder what you will do with a stencil and your layout challenge.  Remember, if you do not have a stencil you can make your own using die-cut machines and or shape punches.

Have fun and let me see what you create.


Sunday, August 31, 2014

Once a month not enough

I can't believe it has been about a month since I last had the chance to write here on my blog.  I so wanted this year to be the year I was able to blog more regularly.  I wanted to blog at least once a week.  I came to the realization just recently that I write too many different things, I have my G&T weekly newsletter, the Better Deals shopping email as well as the big monthly newsletter (which oh bother, I just realized I have not uploaded to the website - will do that next) and then write my blog, no wonder there are times I just don't know what to blog about with regards to my scrapbooking, I am all written/talked out.  I do want to do better and to write here more often and share what I have created and learnt so lets see if I can try to do it tad more often.

Anyway, one of the new things that I have recently got myself into is my garden.  When my girls were younger - even before I had children - I was not very good with plants and gardening.  I was more prone to killing things off that growing them.  Well over the past couple of years I have discovered I can grow strawberries - they don't seem to mind neglect from time to time.  This year my daughter Melissa and I have turned our hand to growing some Spring bulbs, and sure enough over the last 2 weeks they have started flowering.  We are so excited.
I had made one mistake earlier in the season, as I had planted one of the bulbs upside down - was wondering what this white spider looking thing was coming out of the pot.  So turned it up the correct way and re-planted it.  It is flowering now.  Very happy.

Seeing as these were such a success and because over winter I purchased a gardening book (and even finished it - this must be serious) I have been inspired to try to grow more veggies this year - other than tomatoes and lettuce.  The author of the book I purchased is running a class that I have signed up for so you will probably see lots of gardening photos and layout coming through the next few months.

Also lately I have managed to get some of my own scrapbooking done.  Oh it is so nice to be able to take time and actually scrapbook for my own pleasure. Letting my creativity shine and not be confined to a specific range or style.  Here is a layout I have created of my daughter's school production.  I really love the cityscape die-cut from my Silhouette Cameo.  It really added meaning to this layout that was set in New York - love it.
Well that is basically all from me at the moment.
Will hopefully be back to write again soon.

Wednesday, July 30, 2014

Paying Tribute

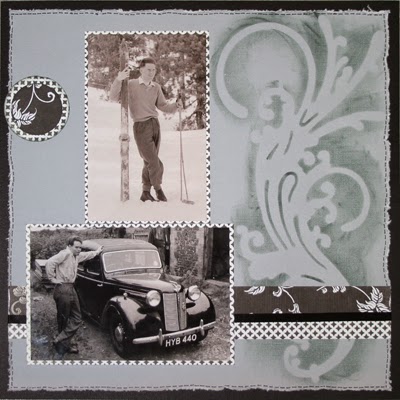
Earlier this year my Uncle passed away.  It was sad in a couple of was as my extended family is not as close as maybe I would like.  I had not seen my Uncle in a couple of years.  Though the nice thing is that I remember him as a strong and generous man.  I was very thankful to be able to attend his funeral and to see my Aunt, cousins and their families - shame it took a sad event to bring us together.  Since then I have wanted to do a tribute layout of my Uncle.  It was hard as I was not sure where to begin.  But recently a line of papers came out from Carta Bella that seemed perfect.  My Uncle was an avid sailor and loved to sail and race his Trimaran boat. So that is where I started, and this is my end result.

I really wanted to keep the photos from the funeral leaflet as there were some really lovely photos, and the hymns were so beautiful so I used two of them.
I also sat down and thought about some of the things I remember of my Uncle and some of the things we all did together.

Tribute pages can be really hard as they are so personal, but I think they are also very important as these people were important in our lives and need to be seen.

Here is another layout I have done of my Uncle and I when I was probably about seven.  I don't remember much of the details about that day, but I do remember being happy and having fun.
Thank you Uncle Ike for being a part of my life and for the advice you shared (I did follow it)
Love you and rest in peace.