Over the weekend I watched a You Tube video from one of my favourite card-makers Jennifer McGuire. After watching the video I just had to give this technique a go. A link to her video is at the end of this post, I do recommend that you watch it. She shows you how to create the background and the die-cut so you can inlay your title of your card.
I loved creating the background so today I have created three more for even more cards.
I wanted to do this as I have a little friend that is desperate need of some happy mail, so I plan to make more cards and send them to her regularly. I think we all need a little bit a happy mail sometimes.
Enjoy Jennifer's video and I hope you too will give it a go.
I hope you all were able to celebrate Father's Day yesterday (in NZ). I made my Dad a cute little card and will be sending it shortly. It just did not happen before Father's Day, but I did get to talk with him yesterday which was really nice. My Dad lives in a little town up north, just South of Kerikeri. I miss going out for a hot chocolate with him at a local cafe.
Ok last week I promised to do a colouring post this week. So I have two cards here for you. One of which I did use for my Dad's Father's Day card. So I will start with that one first (I am hoping to do a video on how I did this technique soon - I miss making videos).
I created this card using Watercolour paper and Distress Crayons. These are really nice to use. See the video below where Tim Holtz takes you through using Distress Crayons.
So I used my set of Festive Berries, Rusty Hinge, Fossilized Amber, Peeled Paint, Chipped Sapphire and Seedless Preserves. I took each colour and added it to more watercolour cardstock to make an Ombre look. Then I took a wet-wipe and carefully wiping from left to right and slowing down ward to move and blend the colours.
Once dry I stamped with my favourite dandelion puff stamp. Later I added a sentiment 'For my Dad'
I was not totally happy with the blending but I am going to try this again on the smooth side of the watercolour paper to see if that helps move the colour and blend better.
Here is my second card that I made. I really love how this one turned out. Firstly I used one of my Party Paws stamps from Crafter's Companion and a sentiment stamp from Kaiser Craft.
To colour this I used my Spectrum Noir pens. I used TN2, TN3 and TN4 for the teddy. The TN3 and TN4 are from the 'Lights' set of pens, they give a really rich, warm colour to teddy. So I started colouring this Teddy's head first and then the rest of the body.
When I was happy with how Teddy looked I went onto the gift. I used TB1, TB2 and TB3 from the basic blues set of 6 pens. TB2 is quite a different blue so I used that as my base for the side of the gift going over it with TB1 so it looks a little darker.
For the ribbon on the gift I used DR1, DR5 and DR7. Use the DR7 sparingly as it is very dark. To finish off I used EB1 for the tag and IG4 for the ground shadow.
Very happy with the result of my colouring for this card.
I came across this idea for these cards from Jennifer McGuire's email that I received a few weeks ago. I watched the video and thought, "Hey, I could do that" and it was so easy.
I just used some of my favourite little stamps that I have had for ages from Imaginisce and added a little sentiment from an older Inkadinkado stamp. I coloured each of my stamped images using my Spectrum Noir pens.
Jennifer McGuire used some nested dies with stitching for her cards, but I did not have these, so instead used my Silhouette Cameo and found some stitched nested designs on the Silhouette Design store.
I cut out my designs and then layered them with foam tape. To add variety I added foam tape to different pieces to put the different frames on different levels. I really like the result.
Here is Jennifer McGuire's video. I hope it inspires you too...
As many of you know I love my Silhouette Cameo, but now I love it even more as I can now use it to cut designs that I can now etch onto glass. For some reason when I thought of glass etching I thought there was a machine you popped your glassware into and it 'tattooed' the design onto the glass - OK you can stop laughing at me now. Well, I saw recently that you could get a glass etching kit for the Silhouette machines and I just had to look into it a bit further. After watching the video on You Tube and saw how easy it was (click here for video), and that you needed no extra tools and just had to order the kit.
So my kit arrived, I opened it, watched the video then left it for about a week and a half before actually giving it a go. I did not want to mess it up. Well over the weekend I did another project with the glass etching and now I am wondering round the house and off to the Warehouse looking at glassware that I can etch. It did expect the etching to be a bit whiter, but I still love the end results.
So here is what I did.
After cutting my design on the vinyl, I used the tranfer paper to add the design to my glass jar. I taped of the top and bottom edges using some washi tape then added a nice thick layer of the glass etching cream. (be sure to wear rubber gloves for this). I left this lot of cream on for about 15 minutes.
After about 15 minutes I scrapped up the excess glass etching cream and put it back in the bottle so it can be used again on my next project. Then I gave the jar a bit of a rinse, to rinse off the last remaining bits of the etching cream. Then removed the vinyl stencil.
Here is the finished result. I am happy with this, now what to put in the jar ... and now ... another piece of glassware hunt.
This Glass Etching Kit for the Silhouette is available to order from my online shop - click here
Oh I have waiting for these since I saw this video from CHA Winter earlier this year. I think these punches are just gorgeous. I have always loved the Martha Stewart Craft punches, but these look amazing.
I will keep you up to date as to when these arrive. They will be available from our online shop and in store once they arrive.
Today I have been given to opportunity to have a go using the new stamping product from Inkadinkado thanks to one of my wonderful suppliers. I get to have a play with the Stamping Gear Deluxe set. Oh my goodness it is so much fun.
I have watched a couple of you tube videos with people using the stamping gear and it looks so easy. How often do you get something that is as easy to use as they show in the videos. Well this Stamping Gear is truly as easy as it looks. Check this one out below and see how easy this is to use.
I literally got the paddles, the circle wheel and two stamps out of the box and started stamping. Ok I am just stamping of photocopier paper, but still it looks cool and I am having ideas on what you can create with it. Here is what I had a wee play with.
I can't wait to keep you updated with I get up to this week with this fun and inspiring new tool
The Stamping Gear has already been uploaded to the online shop so jump on in and order yours. The Deluxe Set us currently out of stock with my supplier but more are on their way for the end of the month, you can still order this and it will be shipped as soon as it arrives. Click here to order yours!
Here is one of the layouts Jennie has kindly created for our newsletter using this months ScrapPack.
This is a video Jennie created as she put this layout together so you can see how she did it and use some of this process to create a similar layout for yourself.
I just remembered this video that I managed to do this month and thought I should share it here on my blog. I had so much fun putting this together. So lovely to work with some older photos of my youngest daughter.
I hope you enjoy this video!
Please leave a comment below and let me know what you think.
The new June newsletter is out for Better scrapbooking so you know what that means. I can post the layouts for this months scrap pack. I loved the pack thins month, awesome bright funky papers, great patterns. Awesomeness!!
For something new this month I had a go at videoing myself making a couple of Los
I am still sort of working out the best angles and stuff with the camera and my video camera is a few years old now so its not Cristal clear like the new cameras you get today, but I have enjoyed making the vids none the less!!
This one is my fat little baby girl, oh how I miss the baby days!
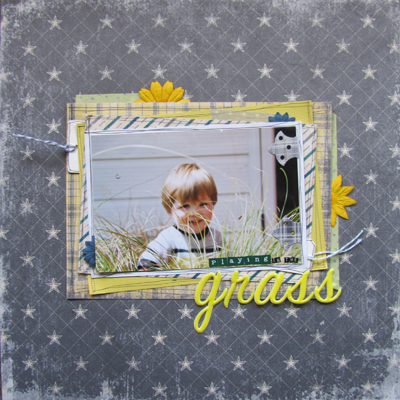
Decided to try and make a boy layout out of this pack, most of the papers were rather girly, but I think I pulled it off.
Another one of miss Bell and the video to match.
Miss Bell again..lol
And lastly, One of me of a change, the photo I used for this isn't very good. I went and got some new ink for the printer only to get home and realise I didn't have any photo paper so I have used just normal printer paper till I get some.